Easy Crispy Dry Rub Wings: Oven-Baked Perfection for Any Occasion
There's a universal craving for perfectly cooked chicken wings – that irresistible combination of tender meat encased in a golden, crunchy skin. While deep-fried versions often come to mind, achieving truly **amazing dry rub wings** at home, right in your oven, is not only possible but incredibly easy and healthier. Forget the messy oil splatters and cumbersome equipment; this recipe delivers restaurant-quality crispness and an explosion of smoky-sweet flavor that will make these a guaranteed hit for any gathering. Whether it's game day, a casual family dinner, a backyard BBQ, or just a spontaneous snack craving, these oven-baked beauties are the ultimate crowd-pleaser. They prove that you don't need a fryer to create wings that boast an incredible crunch and a complex flavor profile, making them a staple for anyone who loves robust taste without the fuss.Unlocking the Secret to Truly Amazing Dry Rub Wings (Why Oven-Baked is Best)
The idea that wings must be deep-fried to achieve that coveted crispy exterior is a common misconception. In reality, with a few simple techniques, your oven can transform ordinary chicken wings into extraordinary, crunchy delights. The key lies in understanding how to eliminate moisture and promote browning and crisping in a dry heat environment. This method not only offers a lighter alternative to frying but also simplifies cleanup significantly, making it ideal for the home cook looking for **amazing dry rub wings** without the extra oil. Oven-baking allows for even cooking and a controlled environment where the dry rub can caramelize and deepen in flavor without burning. This approach ensures every wing is cooked through, with a perfectly rendered fat layer beneath the skin that contributes to its incredible texture.Why You'll Fall in Love with This Recipe
- No Frying, All Crunch: This recipe leverages the power of your oven to deliver an incredibly crispy skin, rivaling any fried wing, but without the added oil, mess, or guilt.
- Explosion of Flavor: Our signature dry rub is a symphony of smoky paprika, a hint of sweet brown sugar, and savory garlic and onion, creating a complex and utterly delicious coating that permeates every bite. This is what truly makes them **amazing dry rub wings**.
- Effortless Preparation: From seasoning to baking, the steps are straightforward. You'll spend more time enjoying these wings than preparing them – just toss, bake, flip, and serve!
- Crowd-Pleaser Guaranteed: Perfect for game day, parties, BBQs, or simply a fun weeknight meal, these wings are universally loved and disappear fast.
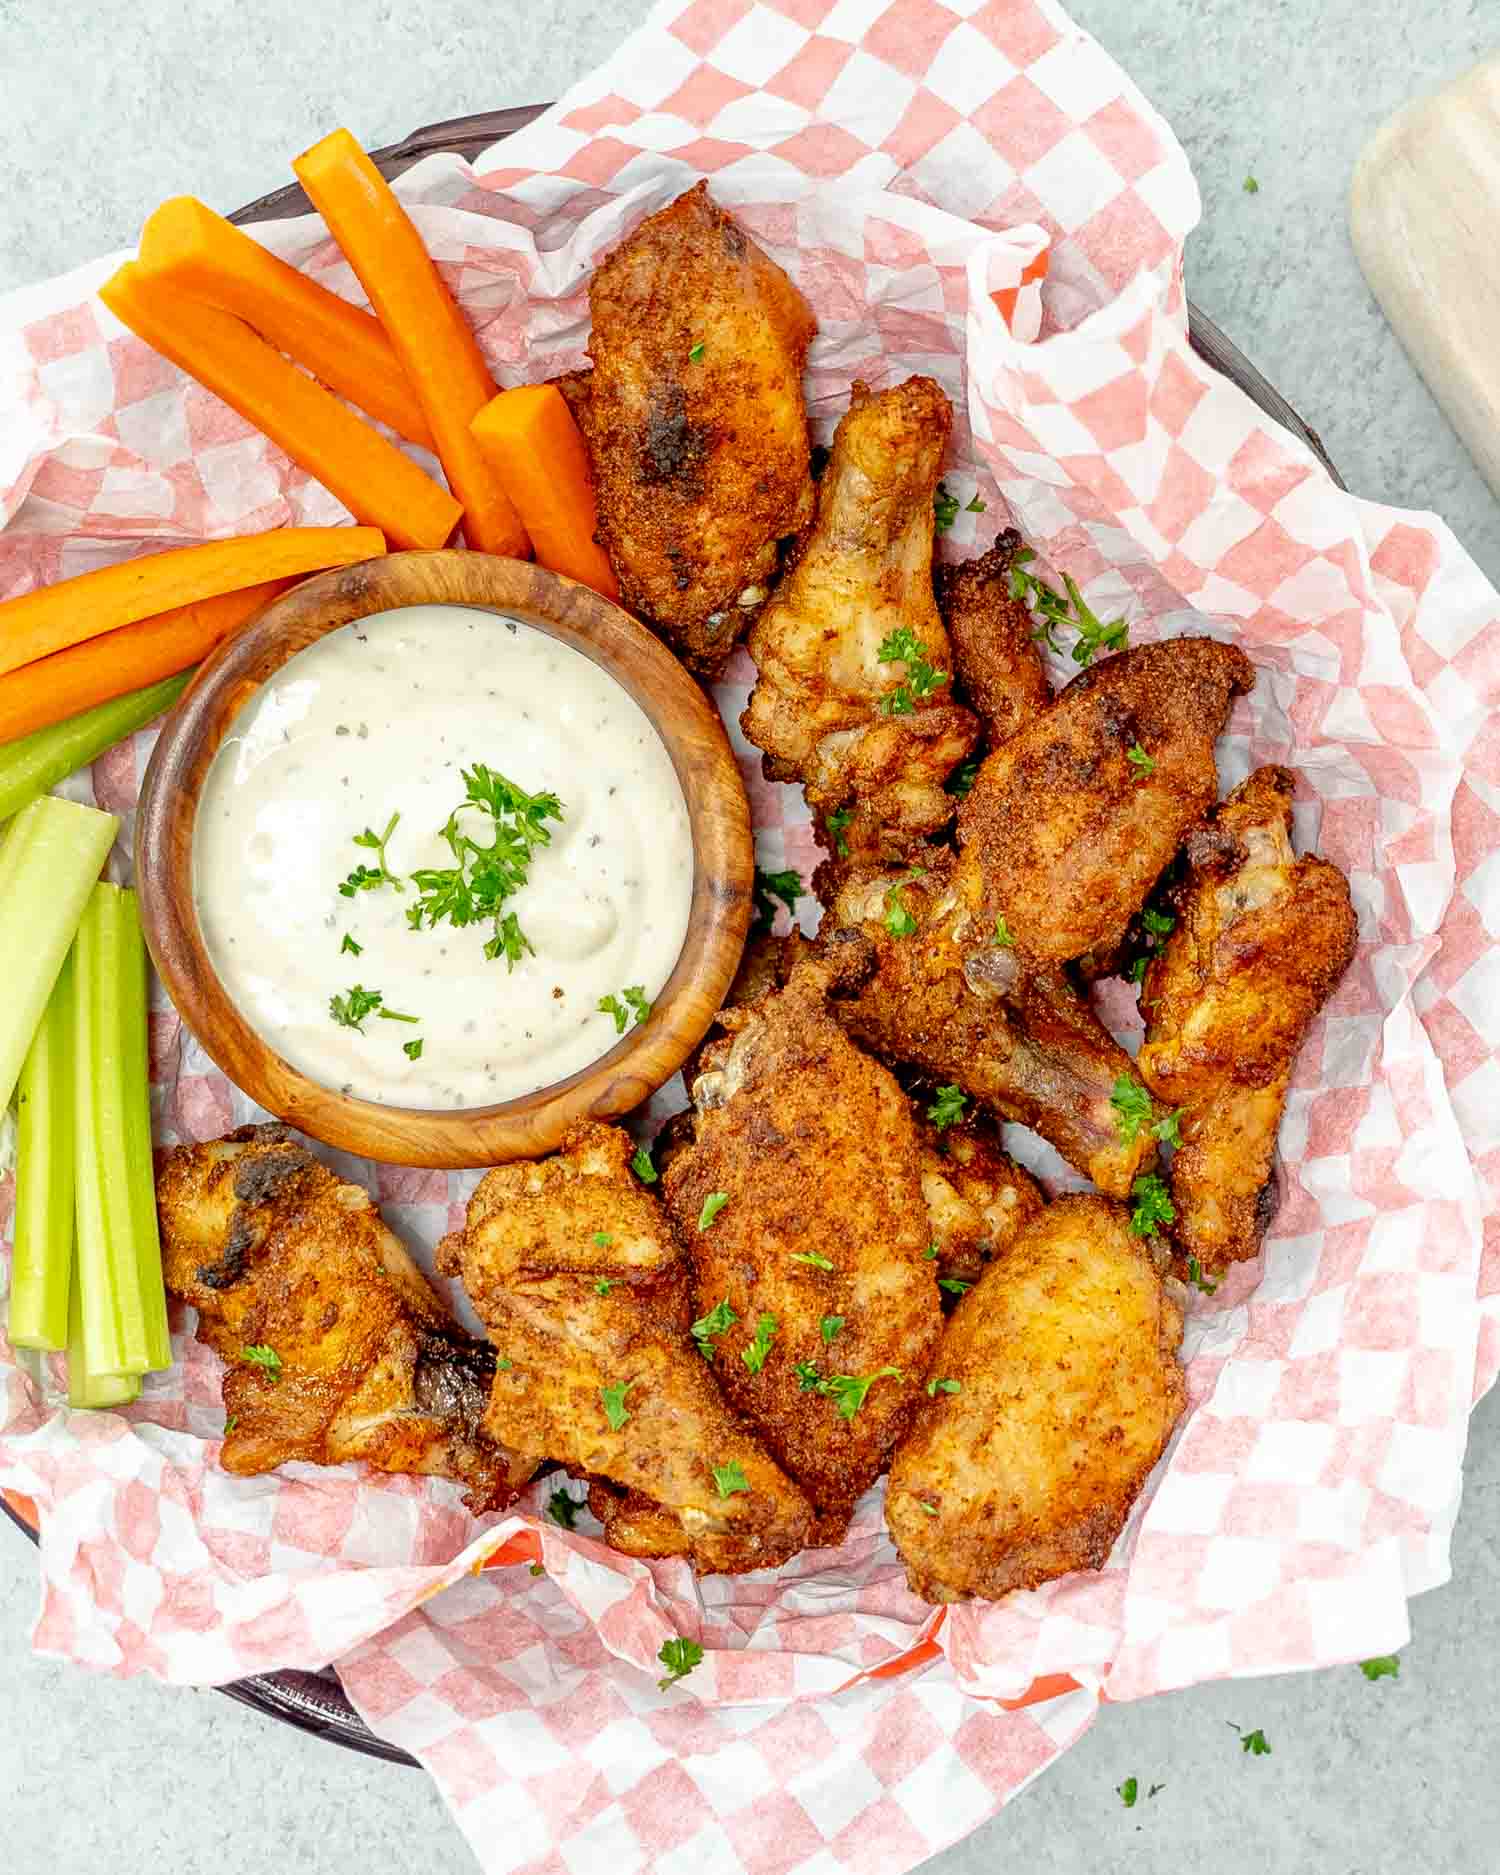
- Versatile & Customizable: Enjoy them on their own, or pair them with your favorite dipping sauces like a cool ranch, creamy blue cheese, or a fiery hot sauce. The dry rub also provides a fantastic base for further flavor experimentation.
Crafting Your Signature Smoky-Sweet Dry Rub (Ingredients & Flavor Profile)
The heart and soul of these **amazing dry rub wings** lies in the homemade spice blend. It's a carefully balanced mix that hits all the right notes: smoky, savory, a touch of sweetness, and just enough aromatic depth to keep you coming back for more. Creating your own rub also gives you the freedom to adjust the spice levels and nuances to perfectly suit your palate.Essential Ingredients for Amazing Dry Rub Wings
To create these phenomenal wings, you'll need the following:
- 2 pounds Chicken Wings: Opt for drummettes and flats (split wings) for even cooking. For best results, look for fresh, plump wings.
- ⅓ to ½ cup All-Purpose Flour: This is your secret weapon for crispness! The flour creates a thin, crunchy crust. For an extra crisp boost, you can substitute a tablespoon or two of the flour with cornstarch or baking powder (baking powder reacts with the chicken skin to draw out moisture and create tiny bubbles for an airy crunch).
- 2 teaspoons Brown Sugar or Brown Sweetener: Provides that essential hint of sweetness that caramelizes beautifully in the oven, adding depth and a gorgeous golden-brown color.
- 1 teaspoon Smoked Paprika: The star of the show, delivering a rich, deep smoky flavor that mimics grilling without the smoke pit.
- 1 teaspoon Chili Powder: Adds a mild warmth and earthy notes, complementing the smoky paprika.
- ½ teaspoon Garlic Powder: A foundational aromatic that provides a savory kick.
- ½ teaspoon Onion Powder: Enhances the savory profile, adding a subtle, sweet oniony depth.
- Salt and Black Pepper: To taste, crucial for bringing out all the other flavors. Don't skimp on seasoning!
- Olive Oil Spray (or any cooking oil spray): A light mist helps the dry rub adhere, promotes browning, and contributes to the overall crispiness.
Feel free to customize your dry rub! For a spicier kick, add a pinch of cayenne pepper. A touch of cumin can add an earthy, warm note, or a sprinkle of dried oregano can bring a Mediterranean twist. The beauty of these Homemade Smoky-Sweet Dry Rub Wings: Oven-Baked & Crispy is their adaptability.
Step-by-Step Guide to Oven-Baked Perfection
Achieving perfectly crispy, flavorful oven-baked wings is all about following a few key steps that ensure maximum crunch and incredible taste. It's a simple process that yields spectacular results every time, making these your go-to recipe for **amazing dry rub wings**.Before You Begin: Pro Tips for Optimal Crispness
- Patting Dry is Paramount: This cannot be stressed enough! Excess moisture on the chicken skin prevents the rub from sticking and makes the wings steam instead of crisp. Use paper towels generously.
- Even Coating is Key: Ensure every single wing, every nook and cranny, is thoroughly coated with the dry rub. This guarantees consistent flavor and a uniform crispy texture.
- Single Layer Baking: Overcrowding your baking sheet is the enemy of crispiness. Wings need space for hot air to circulate around them. If necessary, use two baking sheets.
- The Oil Mist Magic: A light, even spray of oil helps activate the crisping agents in the flour, encourages browning, and contributes to that beautiful golden crust.
- Flip for Uniformity: Flipping the wings halfway through baking ensures both sides get equal exposure to the heat, leading to an even, all-around crispness.
Detailed Instructions:
- Step 1: Preheat & Prep Your Station
Preheat your oven to a robust 375°F (190°C). Line a large baking sheet with parchment paper for effortless cleanup. For even better airflow and crispiness, you can place an oven-safe wire rack on top of the parchment paper, allowing air to circulate all around the wings. - Step 2: Dry Your Wings Thoroughly
Using paper towels, meticulously pat your chicken wings completely dry. Don't rush this step! The drier the wings, the crispier they will become. You can even place them uncovered in the fridge for 30 minutes to an hour to further dry out the skin if you have time. Place the dried wings in a large bowl or a sturdy zip-top bag. - Step 3: Mix the Magic Dry Rub
In a small bowl, combine the flour, brown sugar, smoked paprika, chili powder, garlic powder, onion powder, salt, and black pepper. Whisk these ingredients together until they are thoroughly mixed and there are no clumps. - Step 4: Coat for Glory
Sprinkle the dry rub mixture generously over the chicken wings. If using a bowl, toss well with tongs or clean hands until every wing is evenly and completely coated. If using a zip-top bag, seal it and shake vigorously until the wings are uniformly covered. - Step 5: Arrange for Crispness
Carefully arrange the coated wings in a single layer on your prepared baking sheet (or wire rack). Ensure there's ample space between each wing to prevent steaming. Lightly spritz the tops of the wings with olive oil spray. - Step 6: The First Bake & Flip
Bake the wings for 20 minutes. After 20 minutes, remove the baking sheet from the oven, flip each wing over using tongs, and lightly spritz the other side with olive oil spray. - Step 7: The Final Crispening
Return the wings to the oven and continue baking for another 20-25 minutes, or until they are golden brown, beautifully crispy, and cooked through (internal temperature of 165°F/74°C). For an ultimate crisp finish, you can turn on the broiler for the last 1-2 minutes, watching them carefully to prevent burning.
Serving Suggestions & Customization for Your Amazing Dry Rub Wings
Once your oven-baked **amazing dry rub wings** emerge golden and glistening from the oven, they're ready to be devoured! While they are incredibly delicious on their own, a few simple additions can elevate the experience even further.Perfect Pairings & Dips
- Classic Cool Dips: Serve with a side of creamy ranch dressing, a robust blue cheese dip, or even a simple Greek yogurt dip with herbs.
- Spicy Kicks: A fiery sriracha mayo, a dash of your favorite hot sauce, or a homemade spicy aioli can add an extra layer of flavor and heat.
- Fresh & Zesty: A squeeze of fresh lime juice just before serving adds a bright, zesty counterpoint to the rich, smoky flavors. Fresh celery and carrot sticks offer a refreshing crunch and cooling contrast.
Elevating Your Wing Experience
Don't be afraid to experiment! These dry rub wings are a fantastic base. For those who prefer to save oven space or simply love the method, these wings can also be successfully made in an air fryer following similar temperature and time guidelines, adjusted for your specific model.
Garnish with fresh chopped parsley or cilantro for a pop of color and herbaceous note. Consider dusting with a little extra smoked paprika or a pinch of red pepper flakes right before serving to boost specific flavor profiles. You might also explore other rubs and seasoning blends to make your own signature version of these No-Fry Crispy Dry Rub Wings: Ultimate Oven-Baked Recipe.
